Zod for Runtime Validation in Next.js

I am a frontend developer specialising in the React ecosystem.
Introduction
Zod is a runtime validation library suitable for both backend and frontend. This article will guide you through utilizing Zod in Next.js for securing API routes and performing input validation.
Zod vs. TypeScript
Typescript's purpose is to provide type-checking capabilities during compilation(development phase). It ensures type safety before runtime.
Zod's primary focus is to catch validation errors during runtime. However, we can also infer types from Zod schemas.
Installing Zod
//npm
npm install zod
//yarn
yarn add zod
Creating schemas with Zod
const userInputSchema=z.object({
  username:z.string().min(3).max(40), //
  password:z.string().min(6).max(20)
}) // Schemas assist with runtime validation.

//Getting type from above schema
type AdminType=z.infer<typeof userInputSchema>

//Admin type will look like this
type AdminType = {
    username: string;
    password: string;
}
In the code snippet above, We :
Created an object schema using
z.object()and then we declared the username and password as strings usingz.string()inside the schema.Used min and max functions, which add checks for the length of the variables.
Used
z.infer<typeof Schema>to get the type for the declared Schema.
Complex example
An example containing schema for course details:
const courseInputSchema=z.object({
  title:z.string().min(3).max(150),
  rating:z.number().positive().min(0).max(5),
  description:z.string().min(50).max(700),
  published:z.boolean(),
  gallery:z.array(z.string().url()),//An array of valid URLs
  price:z.number().min(0).max(4999),
  imgLink:z.string()
})

type CourseType=z.infer<typeof courseInputSchema>

// this translates to
type CourseType = {
    title: string;
    rating: number;
    description: string;
    published: boolean;
    gallery: string[];
    price: number;
    imgLink: string;
}
Using safeParse() to secure API routes
//Nextjs API route
import type { NextApiRequest, NextApiResponse } from 'next';
import dbConnect from '../../../lib/dbConnect';
import {z} from 'zod'

const userInputSchema=z.object({
  username:z.string().min(3).max(40),
  password:z.string().min(6).max(20)
})

type AdminType=z.infer<typeof userInputSchema>

export default async function handler(
  req: NextApiRequest,
  res: NextApiResponse
) {
  try {
    await dbConnect(); //connecting to the db
    const parsedInput=userInputSchema.safeParse(req.body)
    if(!parsedInput.success){
      return res.status(400).json({messsage:"Incorrect input"})
    }
    //further backend logic
  } catch (error) {
    console.log(error);
  }
}
Let's break this down:
We use the
safeParse()method from Zod to validate the data from request with our declared inputSchema.safeParse()can give us these outputs:const parsedInput=userInputSchema.safeParse(req.body) //First possible output(successful validation): { success: true; data: {username,password} } //Second possible output(if the input does not match the schema): { success: false; error: ZodError }Before going further into the backend logic, we validate the user input using the schema and if the input is validated, we proceed. Otherwise, we send a response with status code 400 (Read about ZodError).
Zod also provides us with another method
parse(), it directly throws an error instead of returning us with the above-mentioned outputs.safeParse()is preferred due to its simplicity.
Note: We can do similar stuff in expressjs, by creating a schema and then validating request data before proceeding to further backend logic.
Input validation on the client side
Let's define an user input schema for client-side validation:
//Schema
import { z } from 'zod';

const userInputSchema = z.object({
  username: z
    .string()
    .min(3, 'username must have atleast 3 characters')
    .max(40, 'username max length should be 40 characters'),
  password: z
    .string()
    .min(6, 'password must have atleast 6 characters')
    .max(20, 'password max length should be 20 characters'),
});
Here, the second argument to the min and max methods are custom error messages. We will use these custom messages in the next section.
Using the above schema in a form
const SignupForm = () => {
  const [username, setUsername] = useState('');
  const [password, setPassword] = useState('');
  const [errors, setErrors] =
    useState<z.inferFlattenedErrors<typeof userInputSchema>>(); //define type for errors

  const clickHandler: React.MouseEventHandler<HTMLButtonElement> = async (
    e
  ) => {
    e.preventDefault();
    try {
      const parsedInput = userInputSchema.safeParse({ username, password });
      if (!parsedInput.success) {
        setErrors(parsedInput.error.flatten());
      }else {
        //proceed to submit the form
      }
    } catch (error) {
      setUsername('');
      setPassword('');
      console.log(error);
    }
  };

  return (
    <form className="p-4 border border-greyVariant mt-20 text-textColor w-80">
      <h2 className="text-center text-2xl">Signup</h2>
      <div className="flex flex-col mt-3">
        <label htmlFor="username">Username:</label>
        <input
          className="outline-none border-primary border-2 rounded-xl px-2 py-1"
          type="text"
          id="username"
          name="username"
          onChange={(e) => setUsername(e.target.value)}
          value={username}
        />
        {errors?.fieldErrors?.username ? (
          <p className="text-red-500">{errors.fieldErrors['username']}</p>
        ) : null}
      </div>
      <div className="flex flex-col mt-3">
        <label htmlFor="password">Password:</label>
        <input
          className="outline-none border-primary border-2 rounded-xl px-2 py-1"
          type="password"
          id="password"
          name="password"
          onChange={(e) => setPassword(e.target.value)}
          value={password}
        />
      </div>
      {errors?.fieldErrors?.password ? (
        <p className="text-red-500">{errors.fieldErrors['password']}</p>
      ) : null}
      <button
        className="mt-6 bg-primary px-3 py-2 rounded-xl text-bgColor hover:opacity-90 w-full"
        onClick={clickHandler}
      >
        Signup
      </button>
    </form>
  );
};

export default SignupForm;
Let's break this down :
We declare a state variable "errors", which we will use to display our custom error messages.
Before submitting the form, we validate our input data using
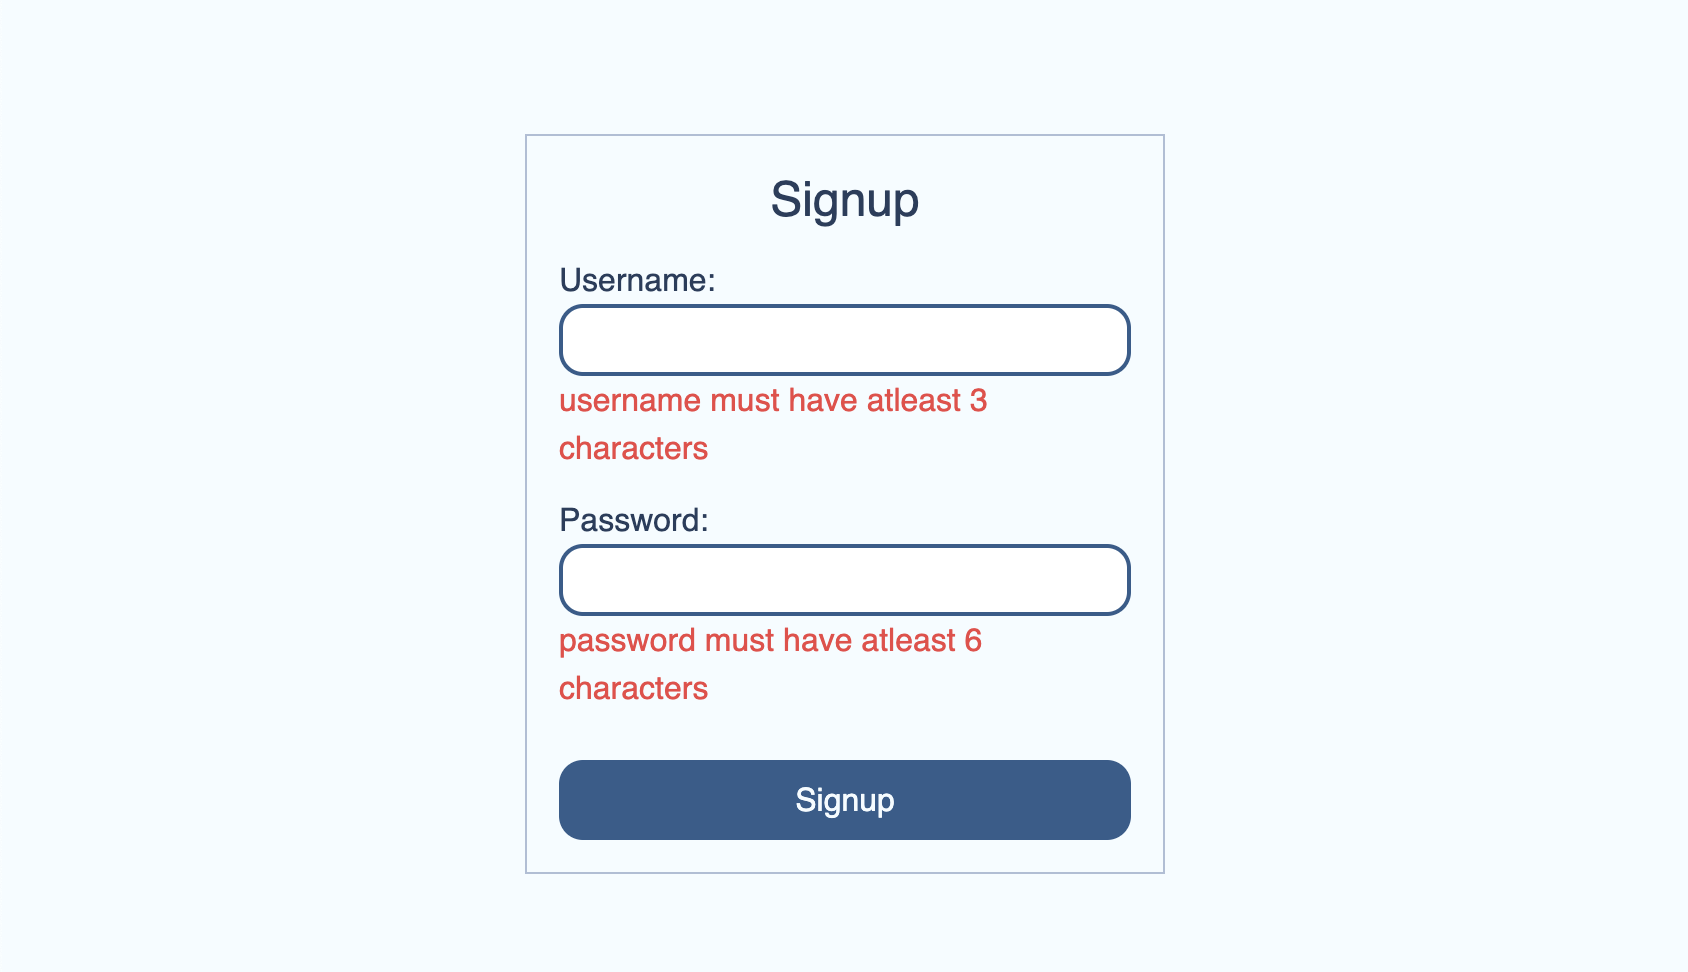
safeParse(), and if the input data is incorrect we store the flattened error object in our state variable.parsedInput.error.flatten() //Output, in case both inputs are incorrect { formErrors: string[], fieldErrors: { password: ['password must have atleast 6 characters'], username: ['username must have atleast 3 characters'], }, }We are displaying the error using
errors.fieldErrors["fieldName"], if it exists.This will look like:
Additional advice: You can also try using Zod with some form libraries like react-hook-form and conform.
I hope you found this article helpful, see you in the next one!
Connect with me on Twitter | Linkedin | Github
Happy Coding! 🎈🎈


